

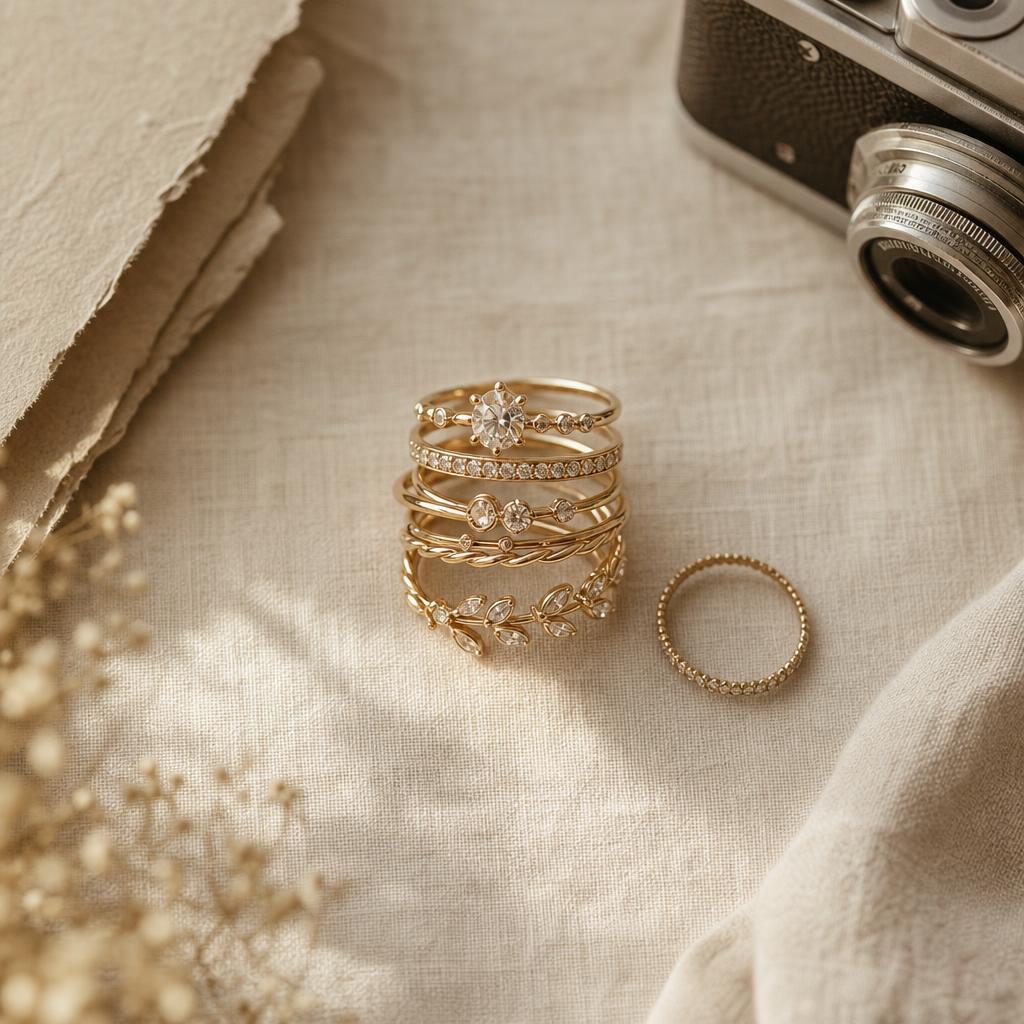
How to Photograph Your Ring Stack: Engagement Ring Photo Ideas That Actually Work
The stack looks incredible in the mirror — the way the light catches each band, the way the pieces sit together like they were always meant to. Then you take the photo, and somehow none of that survives. The sparkle goes flat, the metal looks dull, and the whole thing reads as a blurry smudge on your finger instead of the moment it actually is.
That gap between what you see and what the camera captures almost never comes down to the ring itself. It comes down to light, angle, and background — three things you can control in under a minute, with the phone already in your hand.


Why Ring Photos Usually Fall Flat
Most disappointing ring photos share the same three problems: harsh overhead light, a phone flash firing straight into the metal, and a background busy enough to pull the eye away from the actual point of the picture. None of that is a skill problem. It is a setup problem, and setup takes about thirty seconds to fix once you know what to look for.
It also has nothing to do with how good the ring looks in person. A stack that catches the light beautifully across the room can still photograph as a dull gray smudge under the wrong conditions — which is exactly why so many women assume the problem is their camera, when it was never the camera at all.
The Light Is Doing More Work Than the Camera
Sit near a window instead of under an overhead light. Indirect daylight — the kind that falls into a room rather than beaming straight through the glass — is the single biggest difference between a photo that sparkles and one that looks like a dim close-up. Direct sun creates one blinding hotspot and washes out everything else; an overcast afternoon or a spot just out of the direct beam does the opposite, wrapping soft, even light around every facet.
Turn the flash off entirely. It flattens metal, bounces straight back off pavé stones, and adds a warm yellow cast that no amount of editing fully corrects. If the room feels too dim without it, move closer to the window rather than reaching for artificial light.
✦ Pro tip: Hold your hand a foot or two back from the window rather than pressed against the glass. The light wraps around the stones more evenly from a small distance, instead of blowing out the side facing the window.
Angles That Actually Flatter a Stack
A stack reads differently depending on where the camera sits relative to your hand, and most people only ever try one angle before giving up.
The top-down shot — camera directly above, hand flat and relaxed — is the most reliable option and the one worth starting with every time. It shows the true proportions of each band, how they sit against each other, and whether the metals actually line up the way they do in the mirror. A slight side angle, camera tilted maybe thirty degrees from flat, does something different: it catches the depth of a halo setting and lets light travel across the stones in a way a flat top-down shot can't.

The Infinity Ring
A slim, round pavé band built to catch light from almost any direction, which makes it a useful stress test for angle: if a shot makes this one look dull, the light or angle is the problem, not the ring.
Shop The Infinity Ring →Relax your hand instead of holding it stiff and flat. A slight, natural curl in the fingers looks more like how the stack actually sits day to day, and it keeps the knuckles from flattening the bands and making them look wider than they are. Take more shots than feels necessary — five or six from the same general position, adjusting the tilt by a few degrees each time — and pick the sharpest one afterward rather than trying to judge focus in real time.
Backgrounds That Don't Fight the Sparkle
A cluttered surface behind a ring stack does the same thing a cluttered room does to a good outfit: it competes for attention instead of supporting it. Plain, neutral surfaces work best — a linen napkin, a stone countertop, a piece of matte paper, even the inside of a closed book. The goal is a surface with enough texture to look intentional without introducing a competing pattern or color.
Warm neutrals — cream, sand, soft gray — tend to make silver and pavé settings look brighter by contrast, while a darker surface like slate or a deep wood tone can make a single statement stone pop in a more dramatic, editorial way. Either works. What doesn't work is a busy pattern, a mirror that reflects the room behind you, or a surface so shiny it throws its own glare into the shot.

The Destiny Ring
A low-profile pavé band built to sit flush against a solitaire rather than compete with it, which is exactly what a good stacking photo is trying to capture: one continuous, unbroken line of sparkle.
Shop The Destiny Ring →Worth knowing: No photo trick can manufacture sparkle that isn't there in person, and none needs to. Gemiros' moissanite and CZ stones are cut to the same standards as fine diamonds and pass diamond testers, so what the camera captures is exactly what shows up in the mirror — nothing to stage around, nothing to hide.
Engagement Ring Photo Ideas Worth Stealing
Once the basics are sorted, the most memorable shots tend to come from context, not just close-ups. A hand wrapped around a warm mug on a slow morning, a stack resting against a book cover, fingers laced loosely through a partner's hand — these do more for a photo than a perfect studio close-up ever will, because they put the ring inside a moment instead of isolating it on a table.
A few that consistently work: resting your hand against a textured wall or fabric to add depth without clutter; photographing the stack mid-motion, like brushing your hair back, to catch a more candid angle; or shooting from slightly below eye level with the hand raised, which elongates the fingers and lets the stones catch overhead light. None of these require props beyond what's already around you.
Quick Engagement Ring Selfie Ideas for a Phone and Thirty Seconds
Not every ring photo needs a full setup. For a fast one-handed shot: tap the screen to lock focus directly on the stone before you shoot, since auto-focus tends to grab your hand or the background instead. Turn your hand slightly rather than shooting it dead-on, which avoids the flat, two-dimensional look a straight-on angle tends to produce. And take the shot horizontally even if you plan to crop it vertically later — it's easier to hold steady and gives you more to work with when you edit.
If you're outside, look for open shade rather than full sun: a doorway, an awning, the shadow side of a building. The light there is softer and more even than direct sunlight, without needing to track down a window at all.
A Light Edit, Not a Heavy One
A small brightness and contrast adjustment afterward can bring out real detail — a slightly lifted exposure, a touch more contrast to define the facets, a subtle sharpen if the shot is a little soft. What doesn't help is a heavy filter. Warming filters shift silver toward yellow, cooling filters mute a stone's natural fire, and both make the piece look less like what it actually is. The goal of editing a ring photo is to get closer to what your eye saw in the room, not to invent a different ring entirely.
A Few Mistakes That Flatten a Perfectly Good Ring
Shooting too close is one of the most common. Getting closer than your phone's camera can comfortably focus creates a soft, blurry result that no amount of editing fixes — back up slightly and crop in afterward instead. Skipping the cleaning step is another: a quick wipe with a soft cloth before shooting removes the lotion film and light dust that dull sparkle far more than most people realize. And shooting under mixed lighting — a lamp and a window at the same time — tends to create an odd, uneven color cast across the metal that's hard to correct after the fact.
Quick Takeaways
- Shoot near a window in indirect daylight, and turn the flash off completely.
- Try both a flat top-down angle and a slight side tilt before settling on one.
- Choose a plain, textured, neutral surface over anything patterned or shiny.
- Clean the rings and lock your focus directly on the stone before shooting.
- Take more shots than feels necessary — the best angle is rarely the first one.
Frequently Asked Questions
What's the best light for photographing a ring stack?
Indirect natural daylight, ideally from a window a foot or two away rather than direct sun or an overhead bulb. It wraps evenly around the stones instead of creating one harsh hotspot or a flat, dim look.
Do I need a nice camera, or does my phone work?
A phone works fine. Lock focus directly on the stone by tapping the screen, skip the digital zoom, and move physically closer instead — that alone solves most of the softness people blame on their camera.
What's the best background for ring photos?
A plain, neutral surface with some texture — linen, stone, matte paper — works better than anything patterned or shiny. It gives the sparkle somewhere to stand out instead of competing for attention.
Why do my ring photos always come out blurry or dull?
Usually one of two things: the camera is too close to focus properly, or the light is too harsh or too dim. Back up a little and reframe closer afterward, and move toward a window instead of relying on an overhead light or flash.
None of this requires new equipment or a professional shoot. It requires a window, a plain surface, and a few extra seconds spent finding the angle before you tap the shutter — which is usually the difference between scrolling past your own photo and actually wanting to post it.


