

How to Photograph Your Ring So It Actually Looks as Good as It Does in Person
You know how it goes. Your ring catches the light at just the right angle and you genuinely stop what you're doing to stare at it. Then you try to take a photo, and suddenly it looks flat, grey, and like something you'd find in a car boot sale. The ring hasn't changed. The camera just doesn't know how to handle it yet — but you will, after this.
Whether you've just received a new ring, built a stack worth showing off, or simply want photos that reflect how beautiful your jewellery actually is, the good news is that ring photography isn't complicated. A few deliberate choices — about light, background, angle and focus — are all that separate a flattering photo from a forgettable one. Here are the rings we'd want in the frame, followed by everything you need to know to shoot them well.


Light is everything — and here's what actually works
The single biggest factor in any ring photo is light. Specifically: the quality and direction of it. Hard overhead light — from a ceiling fixture, or direct midday sun — flattens everything and can make a sparkling stone look dull and glassy. The light you want is soft, directional, and slightly diffused.
The best free light source you already have access to is a window. Position yourself so the window is to the side — not behind you, and not behind the ring — and let the light fall across the stone at an angle. This is what creates depth, sparkle, and the dimensional quality that makes a ring look genuinely beautiful rather than like a product listing. Morning and early afternoon light tends to work better than late afternoon, when the angle gets too low and the shadows too heavy.
Worth knowing: On cloudy days, window light becomes even more flattering — the cloud cover acts like a giant softbox, spreading the light evenly and reducing harsh reflections. Don't wait for sunshine to take your ring photos.
If you're shooting in the evening or in a room with no useful natural light, the next best option is a simple ring light or a positioned desk lamp with a daylight-temperature bulb. Point the lamp at a white wall or piece of card and let the bounced, indirect light fall onto your ring. This mimics the diffused quality of window light and gives you much more flattering results than pointing the lamp directly at the stone.
What to avoid: the camera flash. On almost every phone, the built-in flash produces flat, washed-out images and creates a white glare spot in the centre of the stone that kills the sparkle completely. Turn it off. Always.
Background: what you put behind the ring changes everything
A ring photographed against a patterned duvet cover, a busy tablecloth, or the flat of a hand tends to disappear. The eye needs somewhere to rest, and the stone needs contrast to read clearly. Clean, simple backgrounds consistently produce better ring photos.
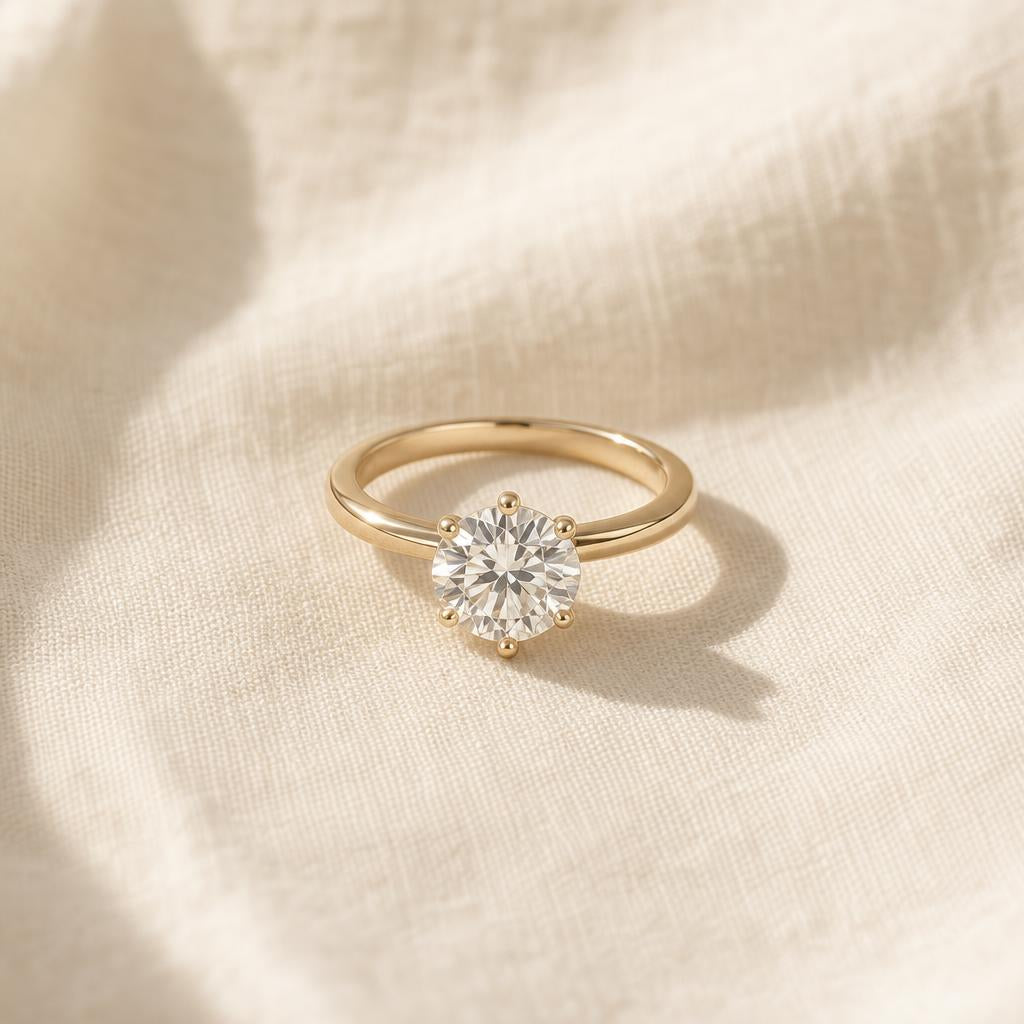
The best options cost nothing or very little: a sheet of white or cream cartridge paper, a piece of linen or cotton fabric, a white ceramic plate, a marble cutting board, or even a flat, light-coloured book cover. If you want warmth and texture, a folded piece of neutral linen laid in soft natural light is hard to beat. If you want something more contemporary and clean, white card with a gentle shadow cast across it reads beautifully.
The ring itself should be the only interesting thing in the frame. This sounds obvious, but it is easy to get distracted trying to add props. A sprig of dried flowers or a simple ring dish can add context without competing — but as a general rule, fewer elements in frame means more attention on what matters.

The Evangeline Ring
A radiant-cut centre stone set with an intricate pavé surround — the kind of ring that rewards close-up photography with extraordinary detail. Shoot it face-up against a neutral background for maximum impact.
Shop The Evangeline Ring →The angles that actually flatter different stone cuts
Different ring cuts photograph well from different positions, and knowing this ahead of a shoot saves a lot of frustrated retakes.
Round cut
Round brilliant stones are designed to reflect light in all directions, which makes them incredibly versatile. They photograph well face-up (looking straight down at the stone), from a slight three-quarter angle, and in close-up detail shots. Halo styles particularly benefit from face-up shots, where the full circle of surrounding stones frames the centre diamond and creates a complete, jewel-like impression.
Radiant and cushion cuts
These cuts have a broad table face that catches and reflects light beautifully when shot from slightly above. A gentle 45-degree angle — camera slightly above the stone, tilted down toward it — brings out the sparkle across the facets without flattening the stone. For radiant cuts like The Aura Ring, this is the angle that shows the stone at its most dimensional and alive.
Asscher cut
Asscher cuts are step-cut stones — they have long, parallel facets that create a depth-within-depth visual effect rather than the explosive sparkle of brilliant cuts. These photograph brilliantly from directly face-up, where the hall-of-mirrors quality of the cut is most visible. Side shots are also effective for showing the profile and geometric structure. Try shooting in slightly softer, lower-contrast light — step cuts benefit more from tonal depth than from hard sparkle points.
✦ Pro tip: Before you shoot, look at the stone through the camera viewfinder and tilt the ring slowly. Watch what happens to the light. Stop when the stone looks most alive — that's your angle. This takes about ten seconds and will dramatically improve your photos.

The Astrid Ring
A 3-carat asscher-cut simulated diamond set in a geometric Art Deco design. The hall-of-mirrors depth of the asscher cut makes this ring extraordinary to photograph face-up — the layered reflections within the stone are unlike anything a brilliant cut produces.
Shop The Astrid Ring →How to focus properly on a ring
Camera phones are very good at photography in general but they genuinely struggle with small, highly reflective objects at close range. The autofocus locks onto the wrong thing, the depth of field eats half the stone, and the result looks like something from 2009. A few habits fix this entirely.
First: tap on the stone itself in your viewfinder to lock focus and exposure on the right spot. This sounds obvious, but it makes an enormous difference. The phone's default autofocus will often decide that the background or a part of your hand is more interesting — override it manually, every time.
Second: do not get too close. Portrait mode on modern phones has an effective minimum focus distance, and trying to shoot closer than that forces a blurry result. If you want a tight close-up, shoot slightly further away and crop in during editing — the result will be sharper than forcing the camera to focus on something it is too near to handle properly.
Third: hold steady, or rest your hand against a surface. Phone cameras have good stabilisation, but it is not magic. Resting your wrist or elbow against a table while you shoot eliminates most camera shake and produces consistently sharper images without any extra effort.
Shooting on your hand: the context shot
A ring photo on a surface tells you the ring is beautiful. A ring photo on a hand tells you how it looks to wear. Both have their place, and the most shareable ring photos often include both — a styled flat-lay followed by a wrist or hand shot that shows the ring in context.
For hand shots, a few things help. Keep nails clean and consider whether their colour is contributing or distracting — a simple nude or clear polish is usually the easiest choice. Position your hand in natural light, ideally at a slight angle so the stone catches the light rather than lying flat. Pay attention to how your hand is positioned: a slightly relaxed, gently curved hand or a downward-angled wrist tends to look more natural and flattering than a completely flat, spread palm.
If the ring is rotating on your finger — which can happen, especially if it is sized slightly large — a small piece of clear ring tape or a sizing insert on the inside of the band will hold it centred for the photo. It takes ten seconds and is the difference between a shot that looks effortless and one that looks slightly off without you being able to say why.
Editing: what to adjust and what to leave alone
Most phones offer basic editing tools that are genuinely useful for ring photography. The adjustments worth making are minimal — over-editing is one of the most common ways to make a ring photo worse rather than better.
Brightness and highlights are the two most useful controls. If your photo looks a little flat or underexposed, a small increase in brightness opens up the stone and makes the sparkle readable. If there are blown-out white areas — usually from reflections in the metal — reducing highlights slightly recovers some of that detail.
Shadows can also be worth adjusting: pulling them down slightly increases contrast in the stone and makes the facets more defined. But be subtle — heavy shadow edits create an artificial look that reads as heavily processed.
✦ Pro tip: Avoid the saturation slider. Ring photos almost never benefit from increased saturation — it makes the metal look unnatural and gives the stone a coloured tint. If your white stone looks slightly warm or cool in tone, adjust the colour temperature slider very gently until it reads as clean white.
What you do not need: filters. The warm, contrasty presets popular on social media compress the tonal range and destroy the fine sparkle detail in a stone. If you want a slightly warmer feel, adjust colour temperature manually rather than applying a preset over the top.
Getting sparkle to actually show in a photograph
Sparkle in a simulated diamond ring comes from light entering the stone, bouncing off the internal facets, and exiting at different angles — creating the flash-and-fire effect that makes these rings so beautiful in person. The challenge photographically is that the camera captures a single instant of that, not the movement and shift the eye experiences as you naturally move your hand.
The way to create sparkle in a still image is to find a light position where multiple facets are catching the light simultaneously. This is done by tilting the ring slowly while watching the camera viewfinder — when you see multiple light points appear across the stone at once, that is your sweet spot. Natural window light from slightly to the side, at approximately 45 degrees to the stone's face, is the most reliable starting point.
On phones with portrait mode or a bokeh effect: use it thoughtfully. Shallow depth of field can look beautiful in a ring photo — the background softens, the stone sits crisply in focus — but it can also blur the edges of the ring or the pavé details if applied too aggressively. If portrait mode is softening parts of the ring itself rather than just the background, switch to standard mode and achieve background softness by shooting slightly further away.
Quick Takeaways
- Use natural window light from the side — turn the camera flash off completely
- Choose a clean, simple background: white card, linen, marble, or a neutral surface
- Tap on the stone to set focus manually every time — never rely on autofocus
- Tilt the ring slowly until you see multiple light points appear across the stone simultaneously
- Round and halo cuts suit face-up shots; radiant and cushion cuts suit a 45-degree angle; asscher cuts suit directly face-up
- Shoot slightly further away and crop in rather than getting too close
- Edit brightness and highlights only — avoid heavy filters, saturation, and over-processing
Frequently asked questions
Why does my ring look dull in photos even though it sparkles in person?
Cameras capture a single frozen moment of light — they cannot replicate the movement your eye perceives as sparkle. The fix is to find the exact light position where the stone is catching light from multiple facets simultaneously. Move the ring slowly in front of a window while watching the viewfinder, and stop when you see the most light points appearing across the stone at once.
What is the best background for ring photography?
Clean and neutral: white or cream paper, linen fabric, a marble surface, or a light ceramic plate. The ring should be the only interesting element in frame. Avoid patterned surfaces, busy textures, or anything that competes visually with the stone.
Can I use my phone camera, or do I need a proper camera?
A modern phone camera is completely sufficient for ring photography. The difference between a good ring photo and a disappointing one is almost always lighting and technique, not equipment. Focus manually by tapping on the stone, use window light rather than flash, and hold your hand steady. That is genuinely all you need.
Should I use portrait mode when photographing my ring?
Portrait mode can work beautifully — the background blur draws the eye directly to the stone. But check that it is not blurring the edges of the ring itself, especially on halo or pavé styles where the fine surrounding stones are part of the beauty. If it is, switch to standard mode and get background softness by shooting slightly further away.
How do I stop my ring rotating on my finger in hand shots?
A small piece of clear ring sizing tape behind the band holds it in position for photos. Ring sizing inserts — small transparent silicone pieces that sit inside the band — also work well and are very inexpensive. Either option gives you enough stability to keep the stone centred for the shot.
The rings worth photographing are the ones worth wearing. Once you know how to capture yours properly, it is hard to go back to hoping the camera just figures it out on its own.


