

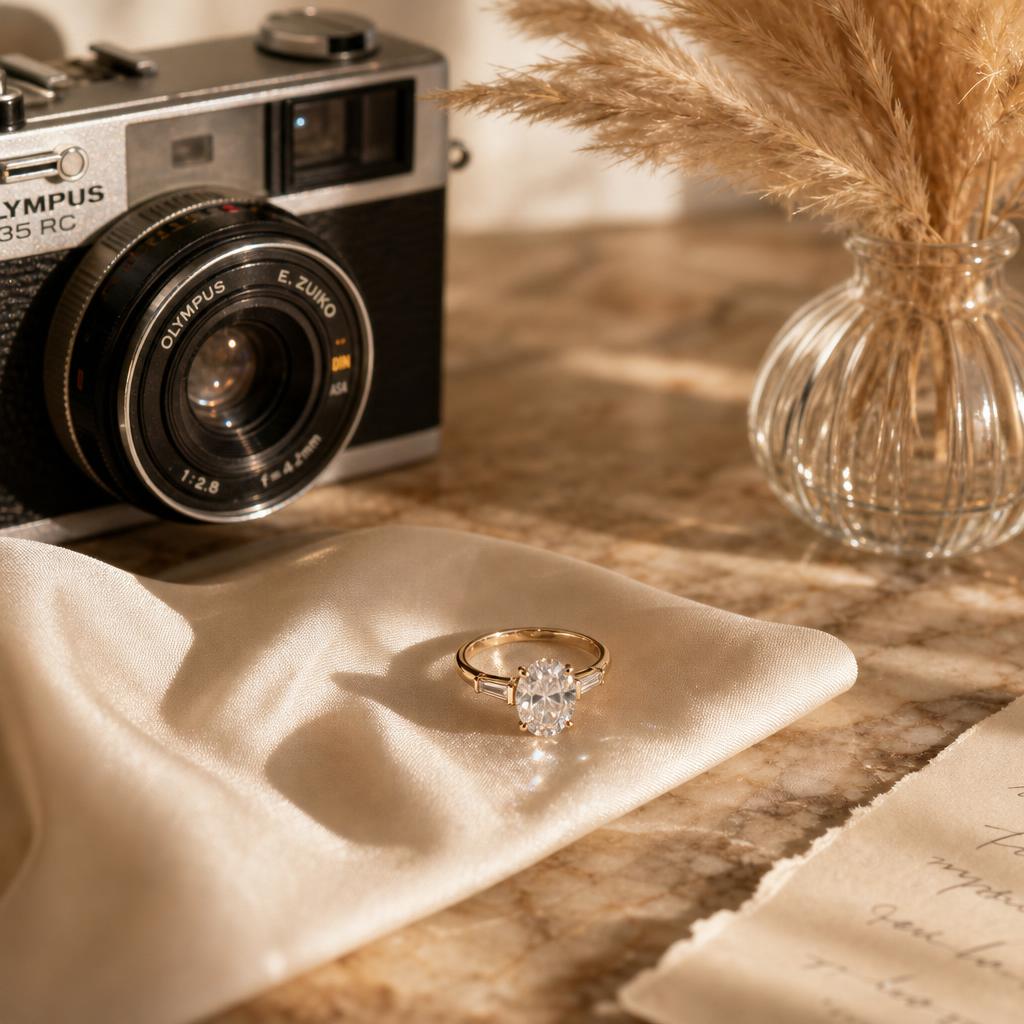
How to Get the Perfect Photo of Your Engagement Ring
The proposal is over. The champagne is poured. And now comes the part nobody warns you about: the first real photo of your engagement ring, the one that's going to end up on Instagram, in a group chat, or framed on a shelf for the next fifty years. It deserves better than a blurry, badly lit selfie taken with shaking hands.
Search "photo of engagement ring" online and you'll find thousands of results, most of which skip the fundamentals. Getting a shot that actually does the ring justice isn't about owning a professional camera or hiring a photographer to trail you around for the weekend — it's about understanding a handful of things most people never think about until the ring is already on their finger: light, angle, timing, and what actually makes a stone catch fire on camera instead of reading as a dull grey circle.


Why light matters more than the ring itself
Here's the thing nobody tells you before you're staring at your camera roll wondering why your ring looks flat: light does more work than the ring. A stunning stone photographed under a harsh overhead kitchen light will look dull and grey. A modest stone photographed in soft, indirect daylight will look like it's throwing off its own sparks. Photographers have known this for decades — it's the single biggest variable in how any gemstone reads on camera, real or otherwise.
The best light for a photo of your engagement ring is soft, indirect, and directional — meaning it's coming from one side, not straight above. Overcast daylight near a window is close to perfect. So is the hour just after sunrise or just before sunset, when light is warm and low. What you want to avoid is flat overhead light (it kills shadows and, with them, sparkle) and direct flash (it bounces straight back off the stone and washes everything out into a white blob).
✦ Pro tip: Turn your hand or the ring slightly as you shoot — sparkle comes from the angle between the light source, the stone's facets, and the camera. A few degrees of rotation can be the difference between a dull shot and one where the stone looks like it's lit from within.
The angles that actually make a ring look bigger and brighter
Most engagement ring photos fail for the same reason: they're shot straight down from directly above, flattening the stone into a single dull facet. Professional jewelry photographers almost never shoot straight-on. Instead, they angle the camera slightly — usually 30 to 45 degrees from the surface — so the lens catches the stone's crown and multiple facets at once, which is where the light show actually happens.
A few angles worth trying deliberately rather than leaving to chance:
- The three-quarter tilt. Angle the hand or ring so the camera sees the stone slightly from the side rather than dead-on — this is what makes a round or oval stone look like it has real depth.
- The macro close-up. Get close enough that the ring fills most of the frame. Most phone cameras have a dedicated macro mode now, and it's worth using — it isolates the ring from a busy background and lets the setting's detail actually show.
- The soft-focus wide shot. Pull back and let the ring sit slightly out of the center of the frame, with the background softly blurred. This is the shot that ends up looking editorial rather than like a product listing.

The Ophelia Ring
An oval center stone set over a hidden halo, with a pavé band that keeps catching light from every angle you turn it toward. It's the ring people assume cost $15,000 or higher — and it photographs exactly like it.
Shop The Ophelia Ring →Engagement ring photo poses that actually work
Poses matter more than people expect, mostly because most of us default to the same stiff, splayed-fingers hand shot that looks nothing like how a hand actually rests. A few engagement ring photo poses that read naturally rather than staged:
- The relaxed drape. Let your hand rest loosely over a shoulder, a cheek, or a partner's hand — fingers slightly curled, not fully extended. This is how hands actually sit, and it reads as candid rather than posed.
- The reach. Photograph the ring mid-motion — reaching for a coffee cup, holding a glass, adjusting a coat. Movement photographs more naturally than a held pose, and it gives the shot context.
- The mirror moment. A soft, slightly angled mirror shot with the ring hand raised toward the face (not directly in front of it) tends to outperform a flat-lay every time — it has a story built in.
- The prop pairing. Ring against a coffee cup, a stack of books, fresh flowers, or a card. This is the classic engagement ring photo idea for a reason — it gives the eye somewhere to land besides just the stone.
Whatever pose you choose, keep the hand relaxed. Tension shows up instantly in photos — tight knuckles, splayed fingers, a claw-like grip. A slightly curled, natural hand position will outperform a stiff one every time, regardless of how good the lighting is.
What to avoid when you're planning the shot
Worth knowing: A simulated diamond ring doesn't need flattering light to hide anything — it's indistinguishable from a mined diamond to the eye and passes diamond testers. The lighting advice here is about making any ring look its best on camera, not compensating for the stone.
A few things that quietly sabotage an otherwise good shot:
- Busy or cluttered backgrounds. A patterned tablecloth or a cluttered counter competes with the ring for attention. Plain surfaces — marble, linen, a solid-color sweater — let the stone do the talking.
- Direct flash. It's the single fastest way to turn sparkle into a flat white glare. If you need extra light, bounce it off a wall or ceiling instead of firing it straight at the ring.
- Overedited filters. A heavy filter can shift the metal's color entirely — platinum can read yellow, rose gold can read orange. Light, natural edits preserve what the ring actually looks like.
- Shooting too far away. A ring photographed from across a room loses all its detail. Get close, even if it means using a phone's macro setting to do it.
How soon after the proposal should you take the photos
There's no rule that says the photo has to happen in the same hour as the proposal — and honestly, it usually shouldn't. The best engagement ring photos tend to happen once the initial adrenaline settles, often the next morning in good daylight, when hands aren't shaking and there's time to actually think about light and background instead of just documenting the moment for a group chat.
That said, plenty of people want an engagement photo with the ring from the moment itself too — and both are worth having. Treat the first photos as the record of the moment, imperfections included, and plan a second, more deliberate session in the days after for the shot you'll actually want to print or frame.

The Harlow Ring
An emerald-cut center stone in a clean halo setting — the step-cut facets throw long, linear flashes of light rather than the scattered sparkle of a round stone, which reads beautifully in a macro shot.
Shop The Harlow Ring →What to wear (and what to put in the background)
Nail color and background tone matter more to a ring photo than most people realize. Bright or dark nail polish competes with the stone for the eye's attention — a bare, neutral, or very soft nail lets the ring stay the obvious focal point. The same logic applies to backgrounds: warm neutrals (cream, stone, soft blush) make a stone's sparkle read clearly, while busy colors or patterns pull focus away from it.
If you're photographing the ring on hand rather than as a flat lay, an engagement ring on hand photo tends to look most natural against skin-toned or warm-neutral backgrounds — think a linen shirt, a wooden table, or natural stone — rather than stark white or heavily saturated colors that fight with skin tone and metal color alike.
Quick Takeaways
- Soft, indirect, side-angled light beats direct overhead light or flash every time.
- Shoot at a 30–45 degree angle to catch the stone's facets, not straight down.
- Relaxed, slightly curled hand positions photograph more naturally than stiff, splayed ones.
- Keep backgrounds plain and neutral so the ring stays the focal point.
- Plan two sessions: one for the moment itself, one deliberate session once things settle.
None of this requires an expensive setup. A ring on a hand near a window, angled slightly, photographed close enough to fill the frame — that's most of what separates a photo of an engagement ring that looks like an afterthought from one that looks like it belongs in a magazine. The ring does the rest.
Frequently asked questions
How do you take a good photo of your engagement ring?
Use soft, indirect daylight from the side rather than overhead light or flash, angle the camera 30–45 degrees to catch the stone's facets, and shoot close enough that the ring fills most of the frame. A plain, neutral background keeps the focus on the stone rather than its surroundings.
What should you avoid when photographing an engagement ring?
Direct flash, cluttered or patterned backgrounds, heavy filters that shift the metal's color, and shooting from too far away are the most common mistakes. Each one either flattens the sparkle or pulls attention away from the ring itself.
What are the best engagement ring photo poses?
A relaxed, slightly curled hand reads more naturally than a stiff, fully extended one. Strong options include a hand resting on a shoulder or cheek, a mid-motion reach toward an object, a softly angled mirror shot, or the ring paired with a simple prop like flowers or a coffee cup.
How soon after getting engaged should you take ring photos?
There's no fixed rule. Many people take a first, unplanned photo in the moment itself, then a second, more deliberate session once the initial adrenaline settles — often the next morning in good daylight, when there's time to think about angle and background.
What's the best nail or background color for photographing your ring?
Neutral or bare nails let the stone stay the focal point rather than competing with bright polish. For backgrounds, warm neutrals like cream, stone, and soft blush tend to flatter both the metal and the sparkle better than stark white or heavily saturated colors.
However you choose to capture it, the moment is yours to document exactly the way you want — with light that flatters, an angle that shows off the stone, and a ring that was built to hold up to exactly this kind of attention.


